Demonstration Notebooks: Campus Survey#
The Campus-Demo-Notebook is a simple workflow designed for a team of recorders to observe landscape elements and street furniture in a typical campus setting.
Access#
To access the survey go to https://fieldmark.app/ on your browser.
Then:
Sign in
Choose the button
Activate
Campus-Survey-Demowith the button in the column labelled “Sync”.Wait for the notebook to load
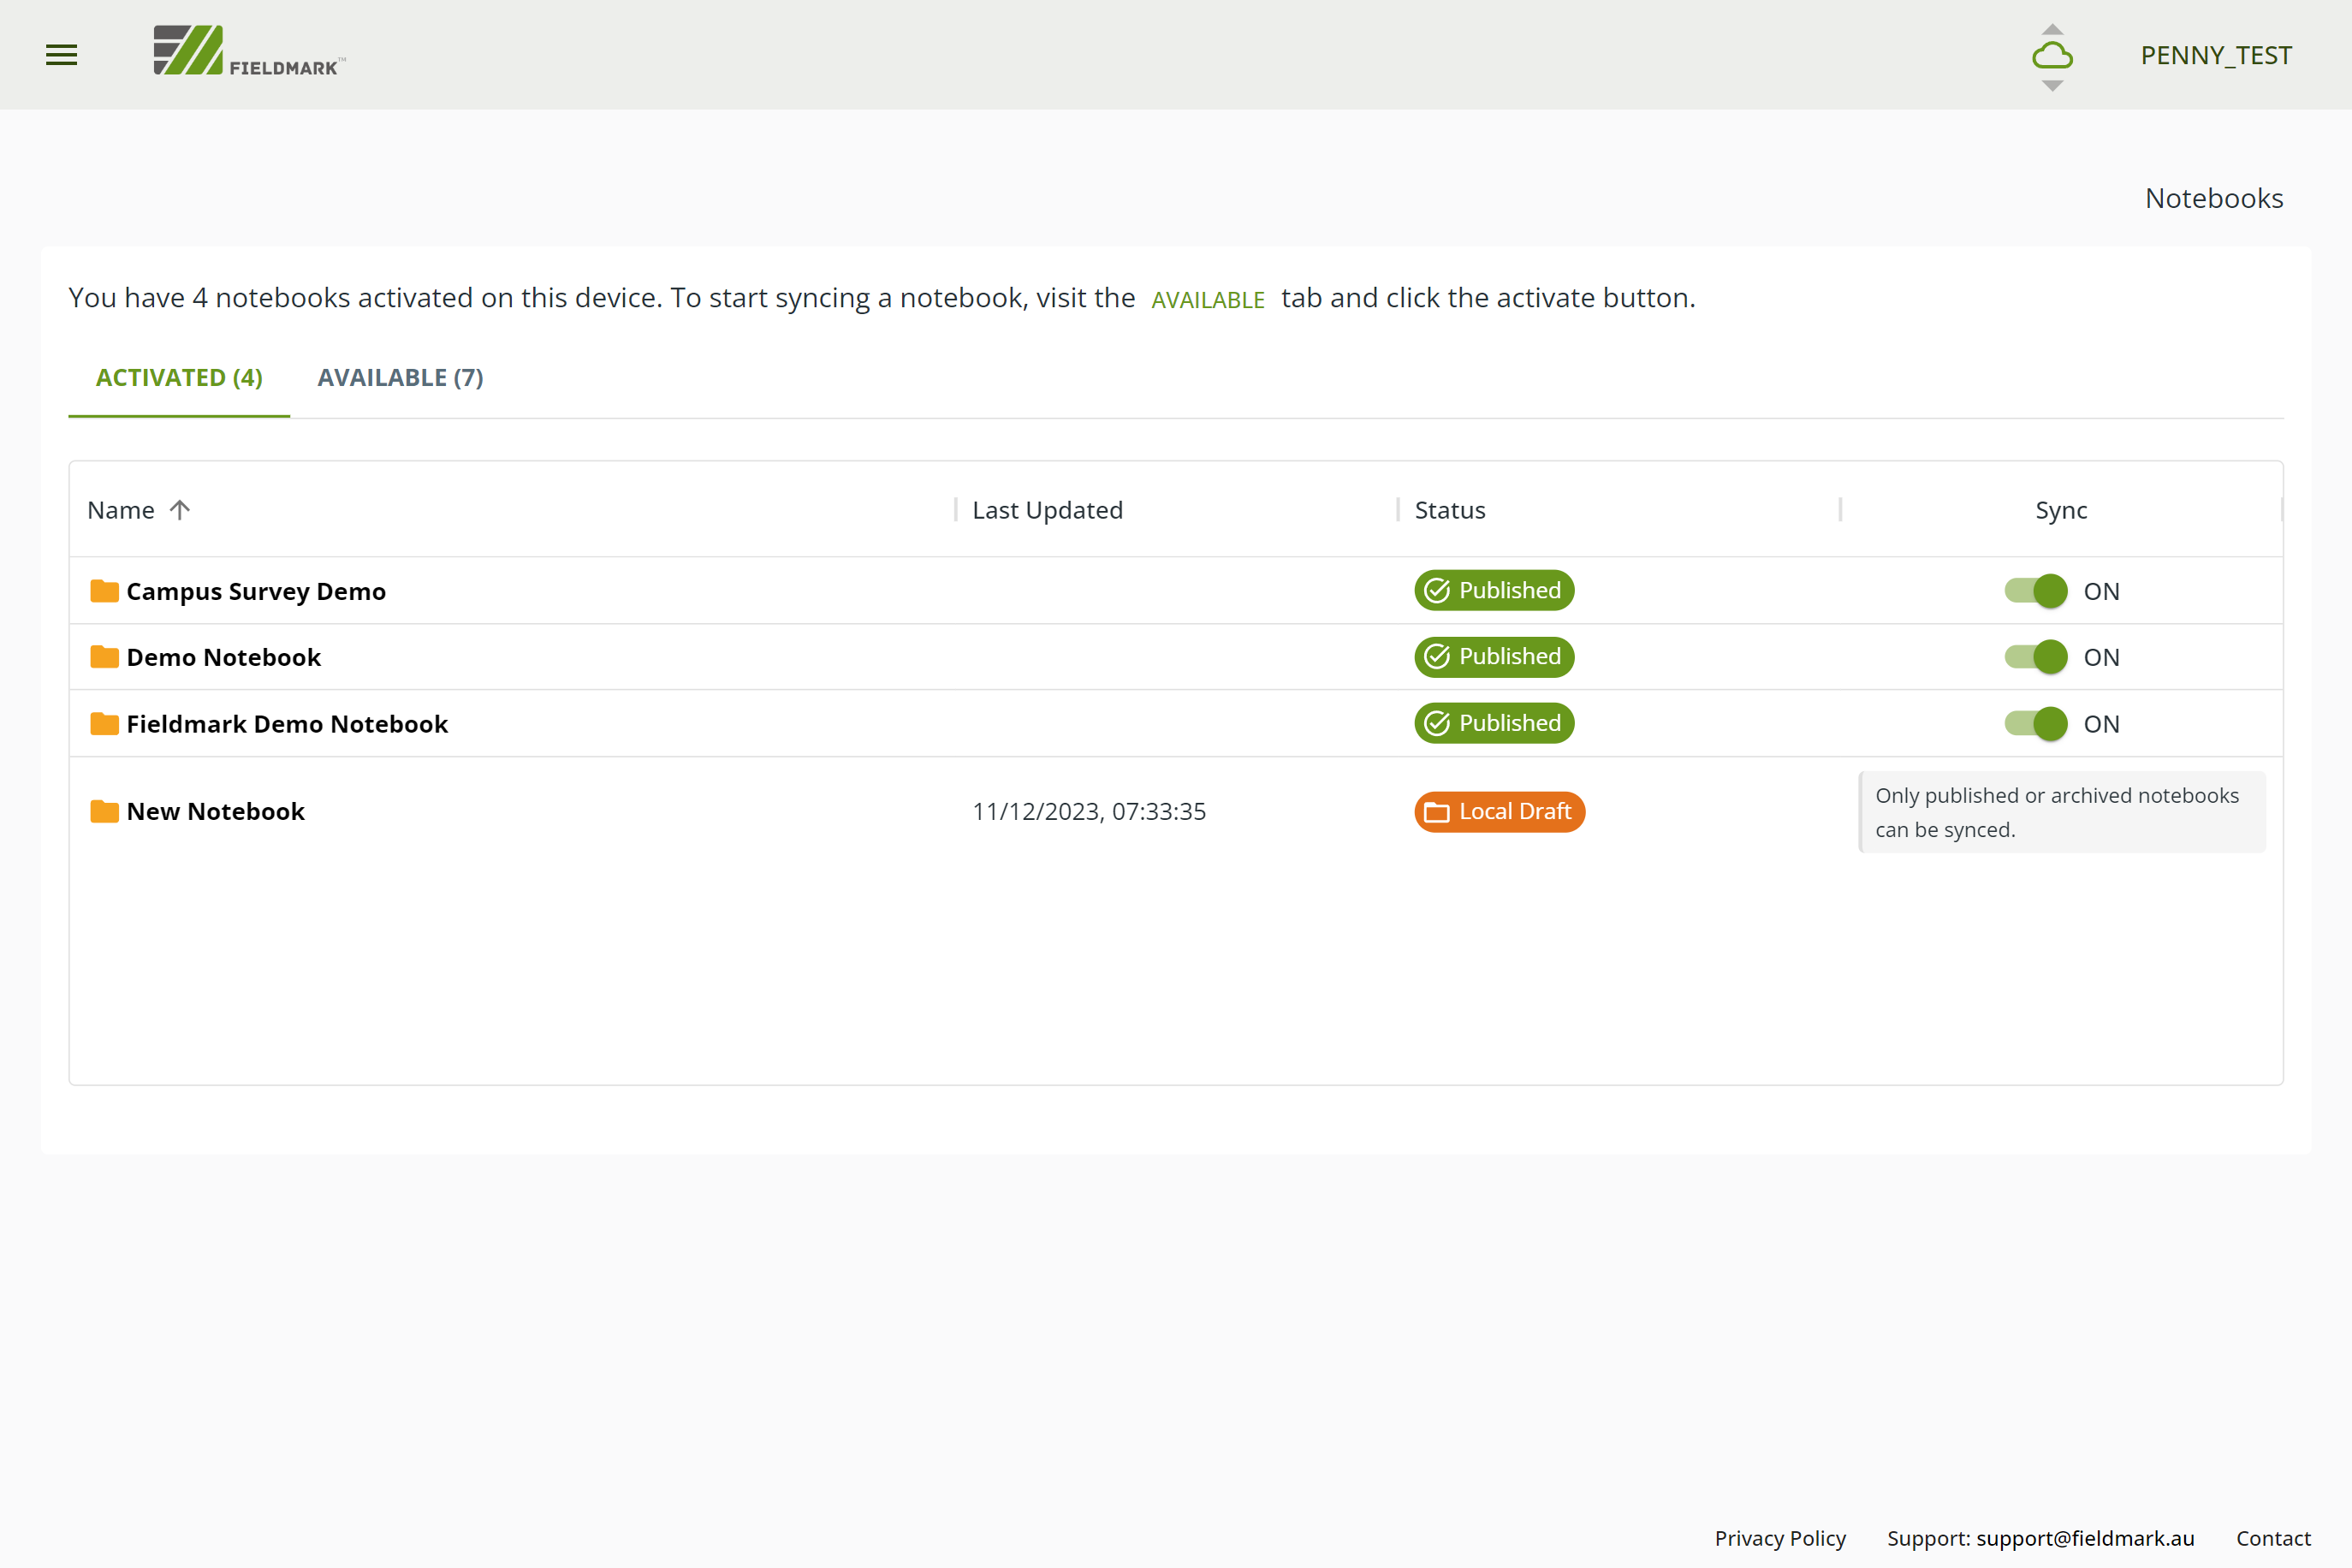
Click on the Campus Survey Demo in the Activated notebook tab:
Task 1: Setting ID ranges#
The first task is setting parameters for the ID auto incrementors. This will allow each team to set starting and final ID numbers so that a unique sequence can be built across all the data collected. (This is a configurable setting and can be adjusted for each notebook.) To set the ID range:
Ensure you are in the notebook records list screen.
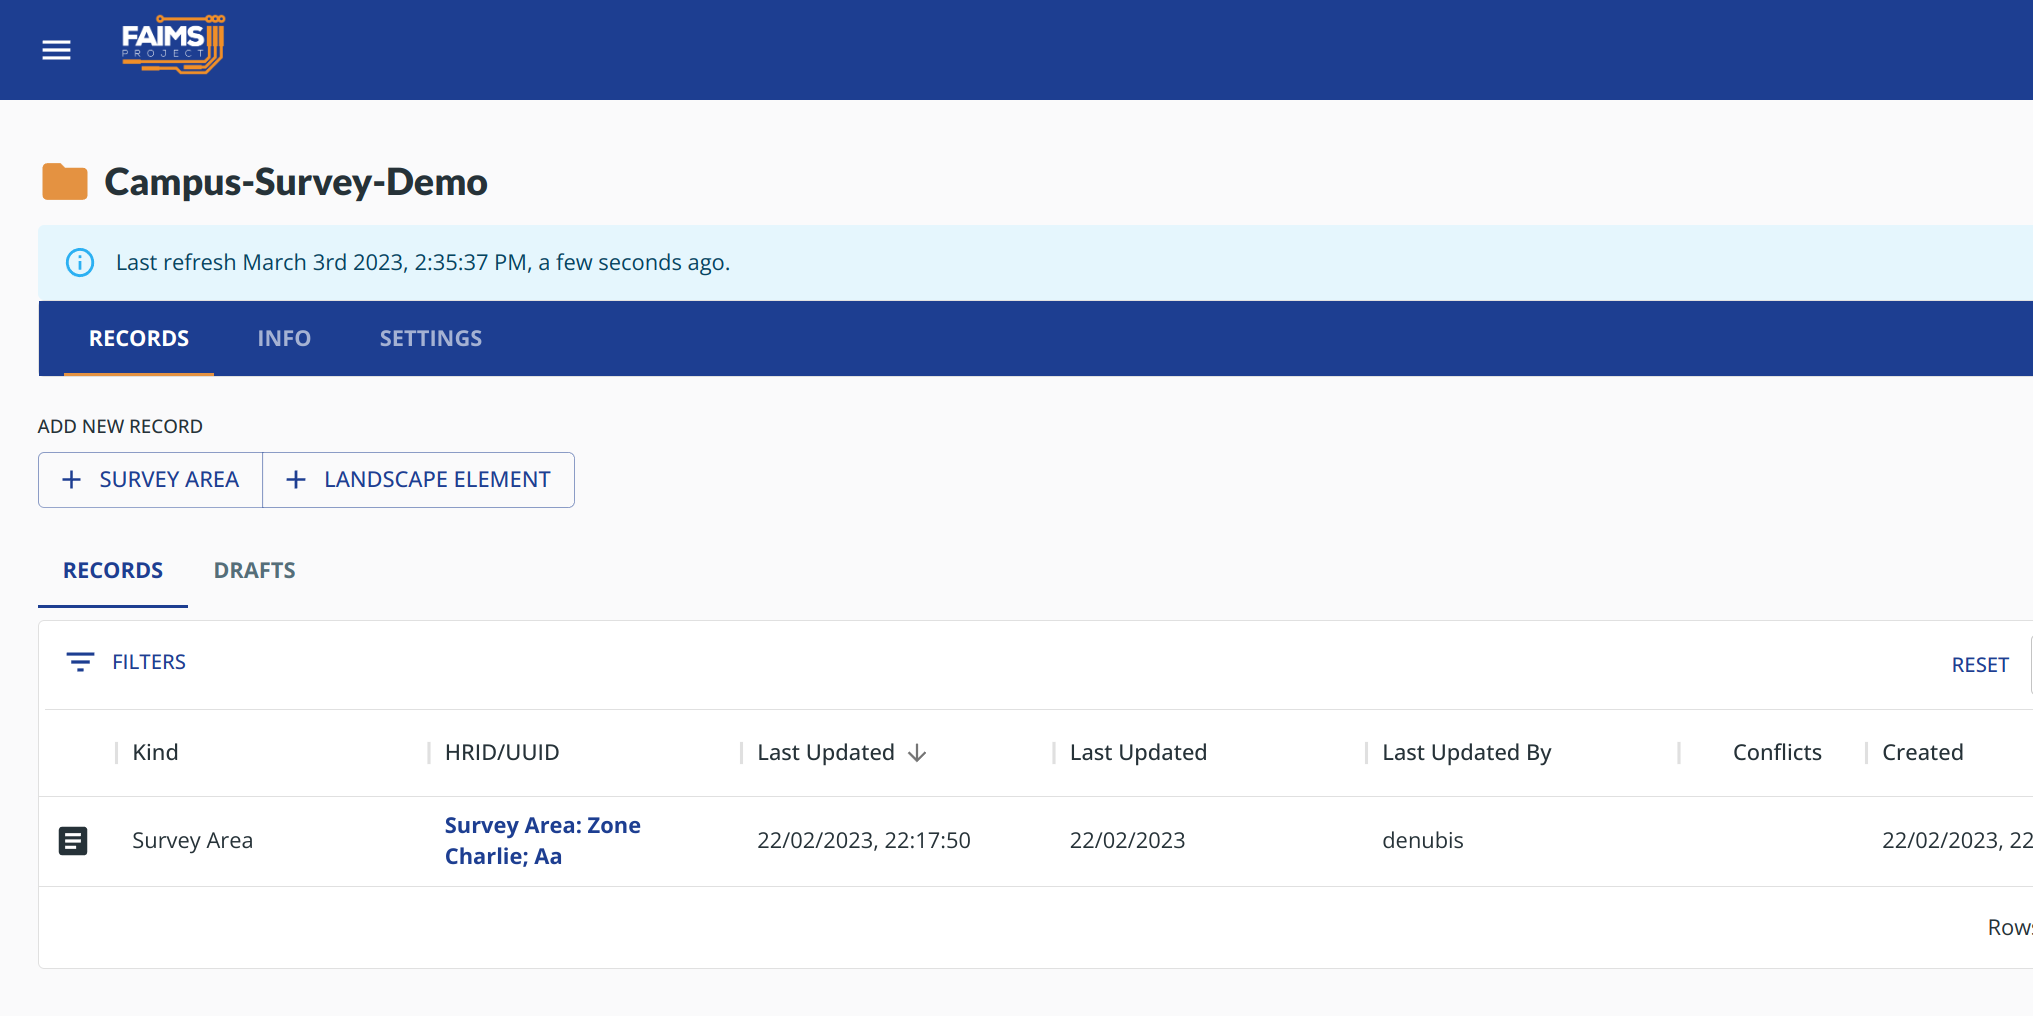
Choose the settings tab.
Find the box labelled
Edit Allocations for Landscape Element <Description> AutoIncrementerClick
Enter the range for your username, eg 0-49, 50-99:
Username |
Zone |
ID from |
ID to |
|---|---|---|---|
MQMarcusAgrippa |
Charlie |
1 |
49 |
MQActus |
Charlie |
50 |
99 |
MQTralles |
Charlie |
100 |
149 |
MQIsidoreOfMiletus |
Charlie |
150 |
199 |
MQApolloudiusOfDamas |
Charlie |
200 |
249 |
Click ‘Update Range’.
You will see a Snackbar notification with Range Successfully Updated
Task 2: Setting Survey Area#
Each group will cover a ‘predetermined’ Survey area (Today, everyone will be using zone charlie) and enter some metadata before heading out into the field. To create a Survey Area record:
Click on in the top right corner of the Notebook homepage
You can begin to enter info (fictional or based on your observations) about the survey area:
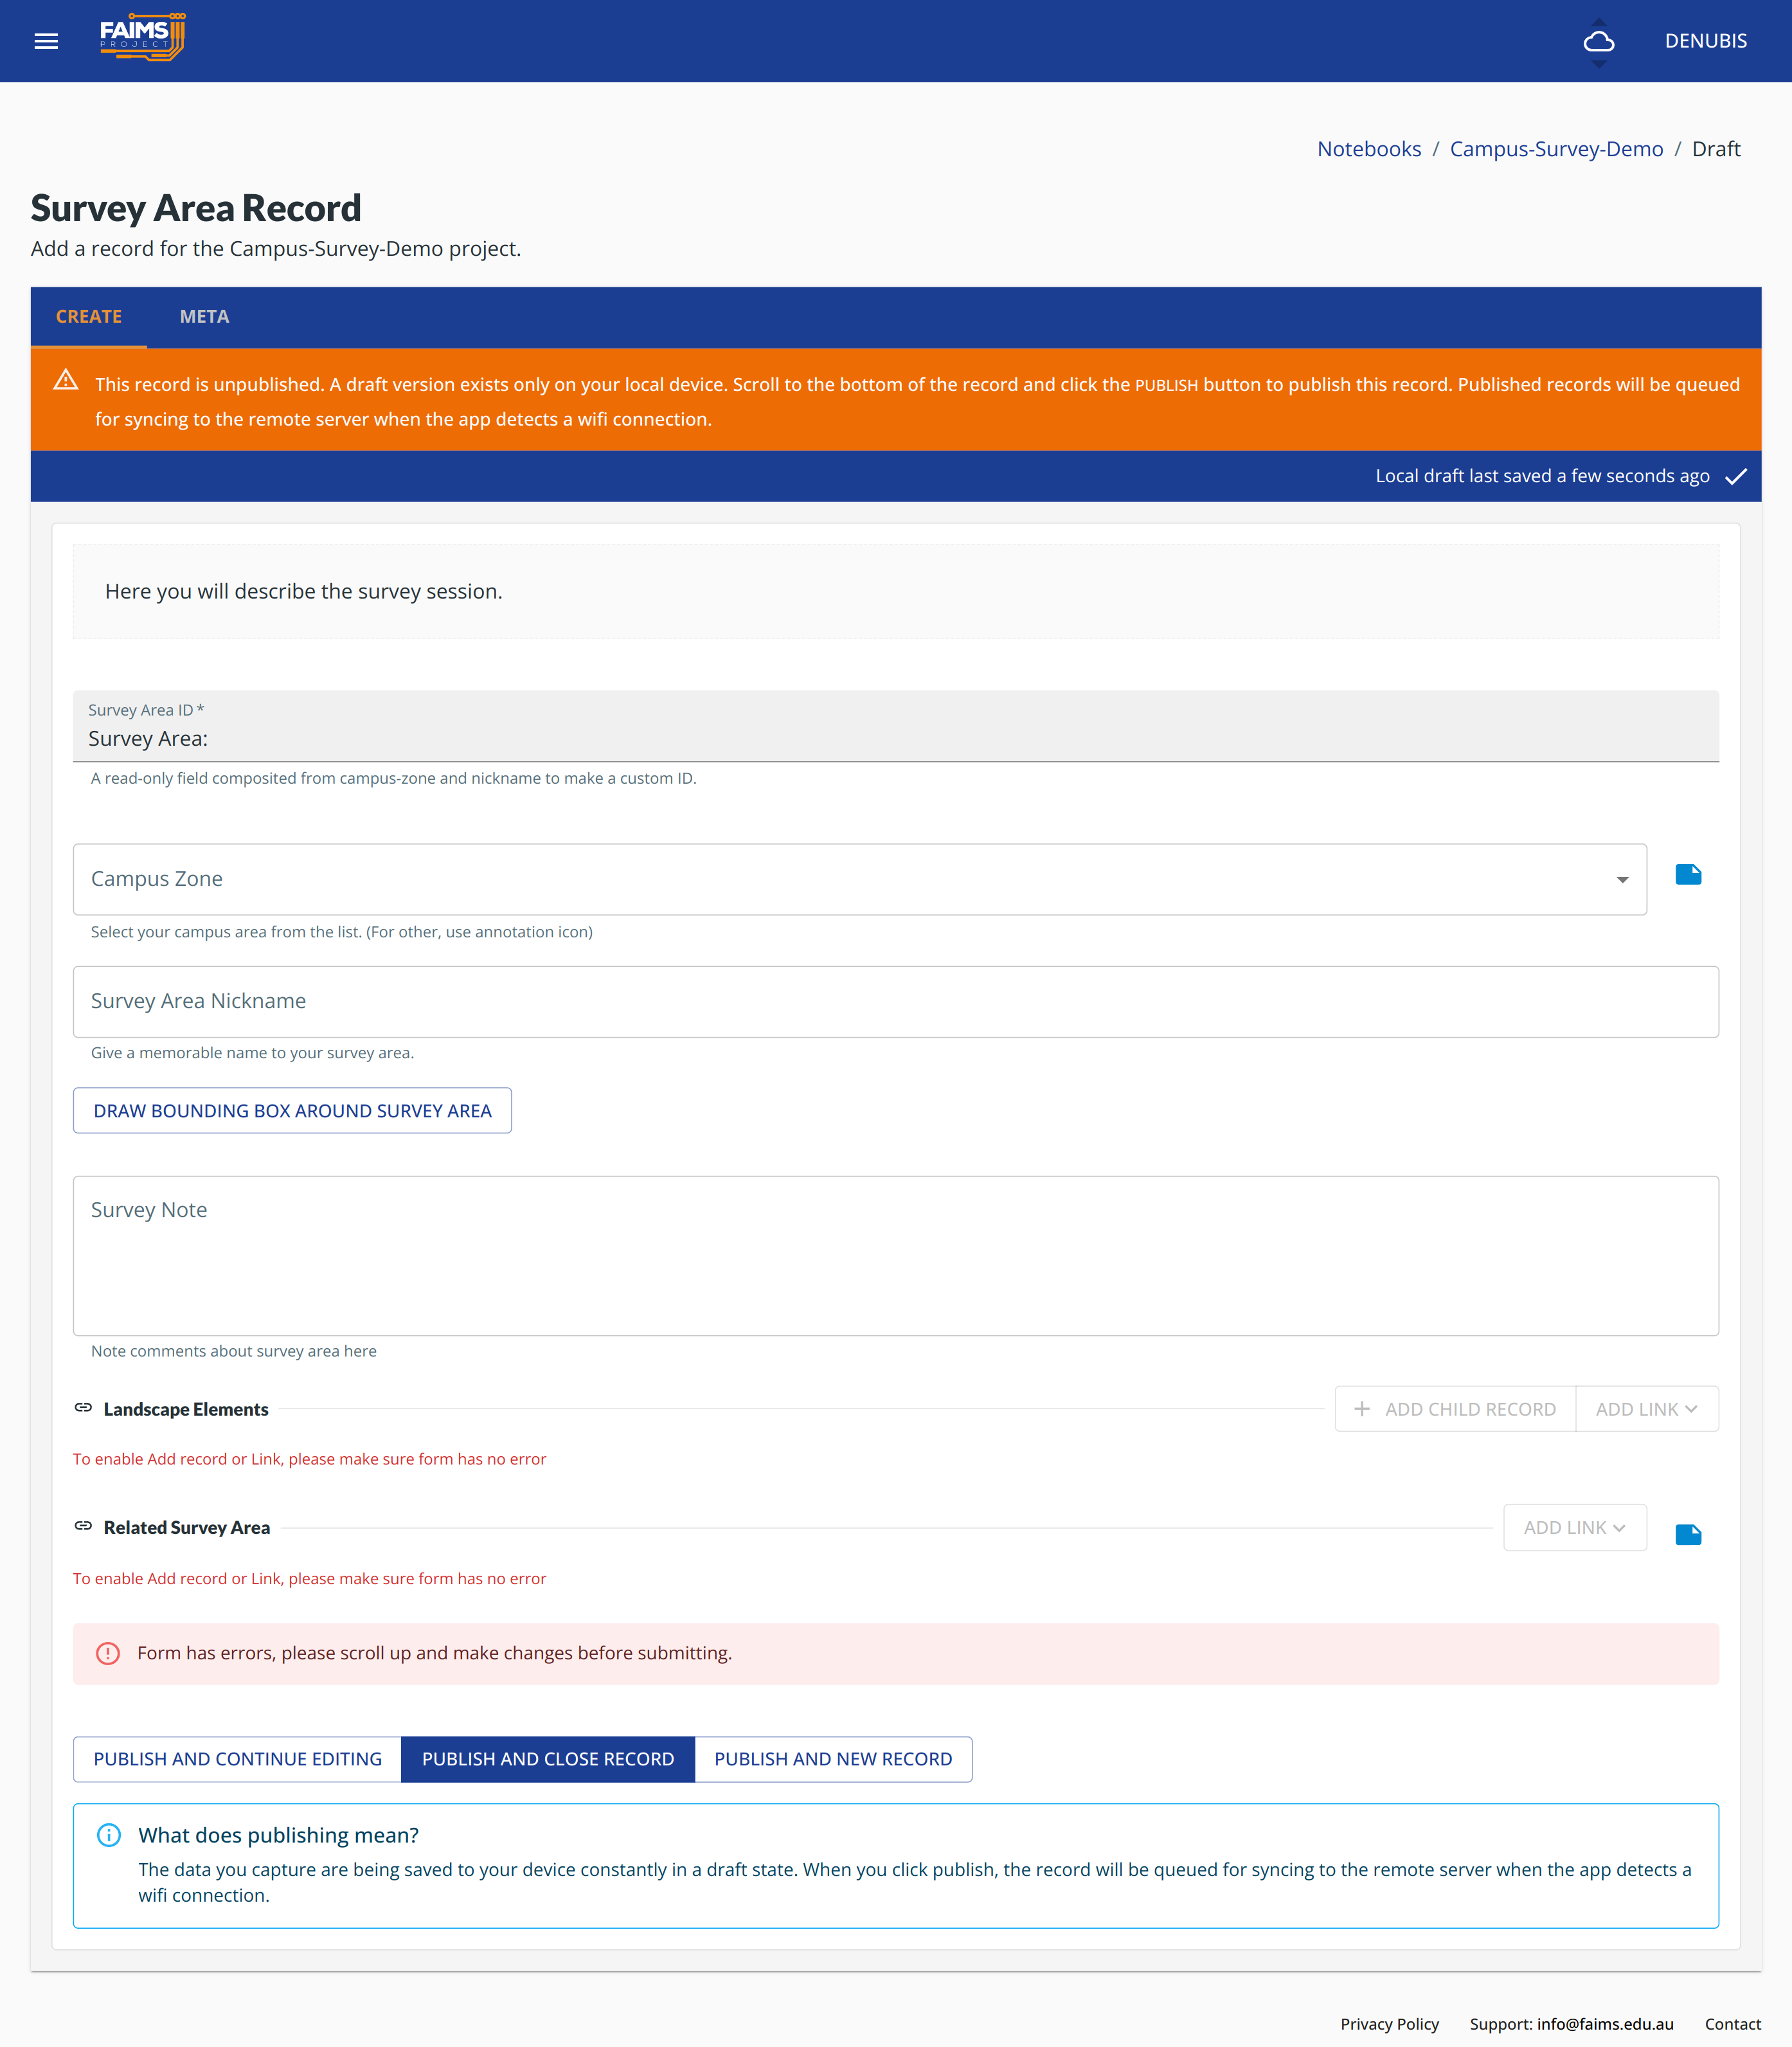
Select Zone Charlie.
Add a nickname (eg Eating Hall) to remember the area.
Use the map view to draw a bounding polygon for the Survey Area.
Tap to capture the point at which you commenced the survey.
Warning
If you don’t see , ensure you are in Zone Charlie
Make a Note if needed.
You must click for the record to move from Drafts and be synchronized with other devices.
Task 3: Data collection#
Participants will head outside (if possible) and collect sample data.
You can create new Landscape Element records in two ways, either:
Warning
If you get a Snack bar/alert saying that Failed to get autoincremented ID and “No ranges exist for this notebook yet. Go to the notebook Settings tab to add/edit ranges”, you forgot to do task 1. Leave the record perform task 1.
From the Survey Area Form, by tapping
From the Notebook homepage by tapping (Note: Landscape elements added from the Notebook’s homepage will not be linked to a Survey Area. To associate an existing Landscape element with a Survey Area, select inside a survey area in the Landscape Elements relationship field.)
You will see:
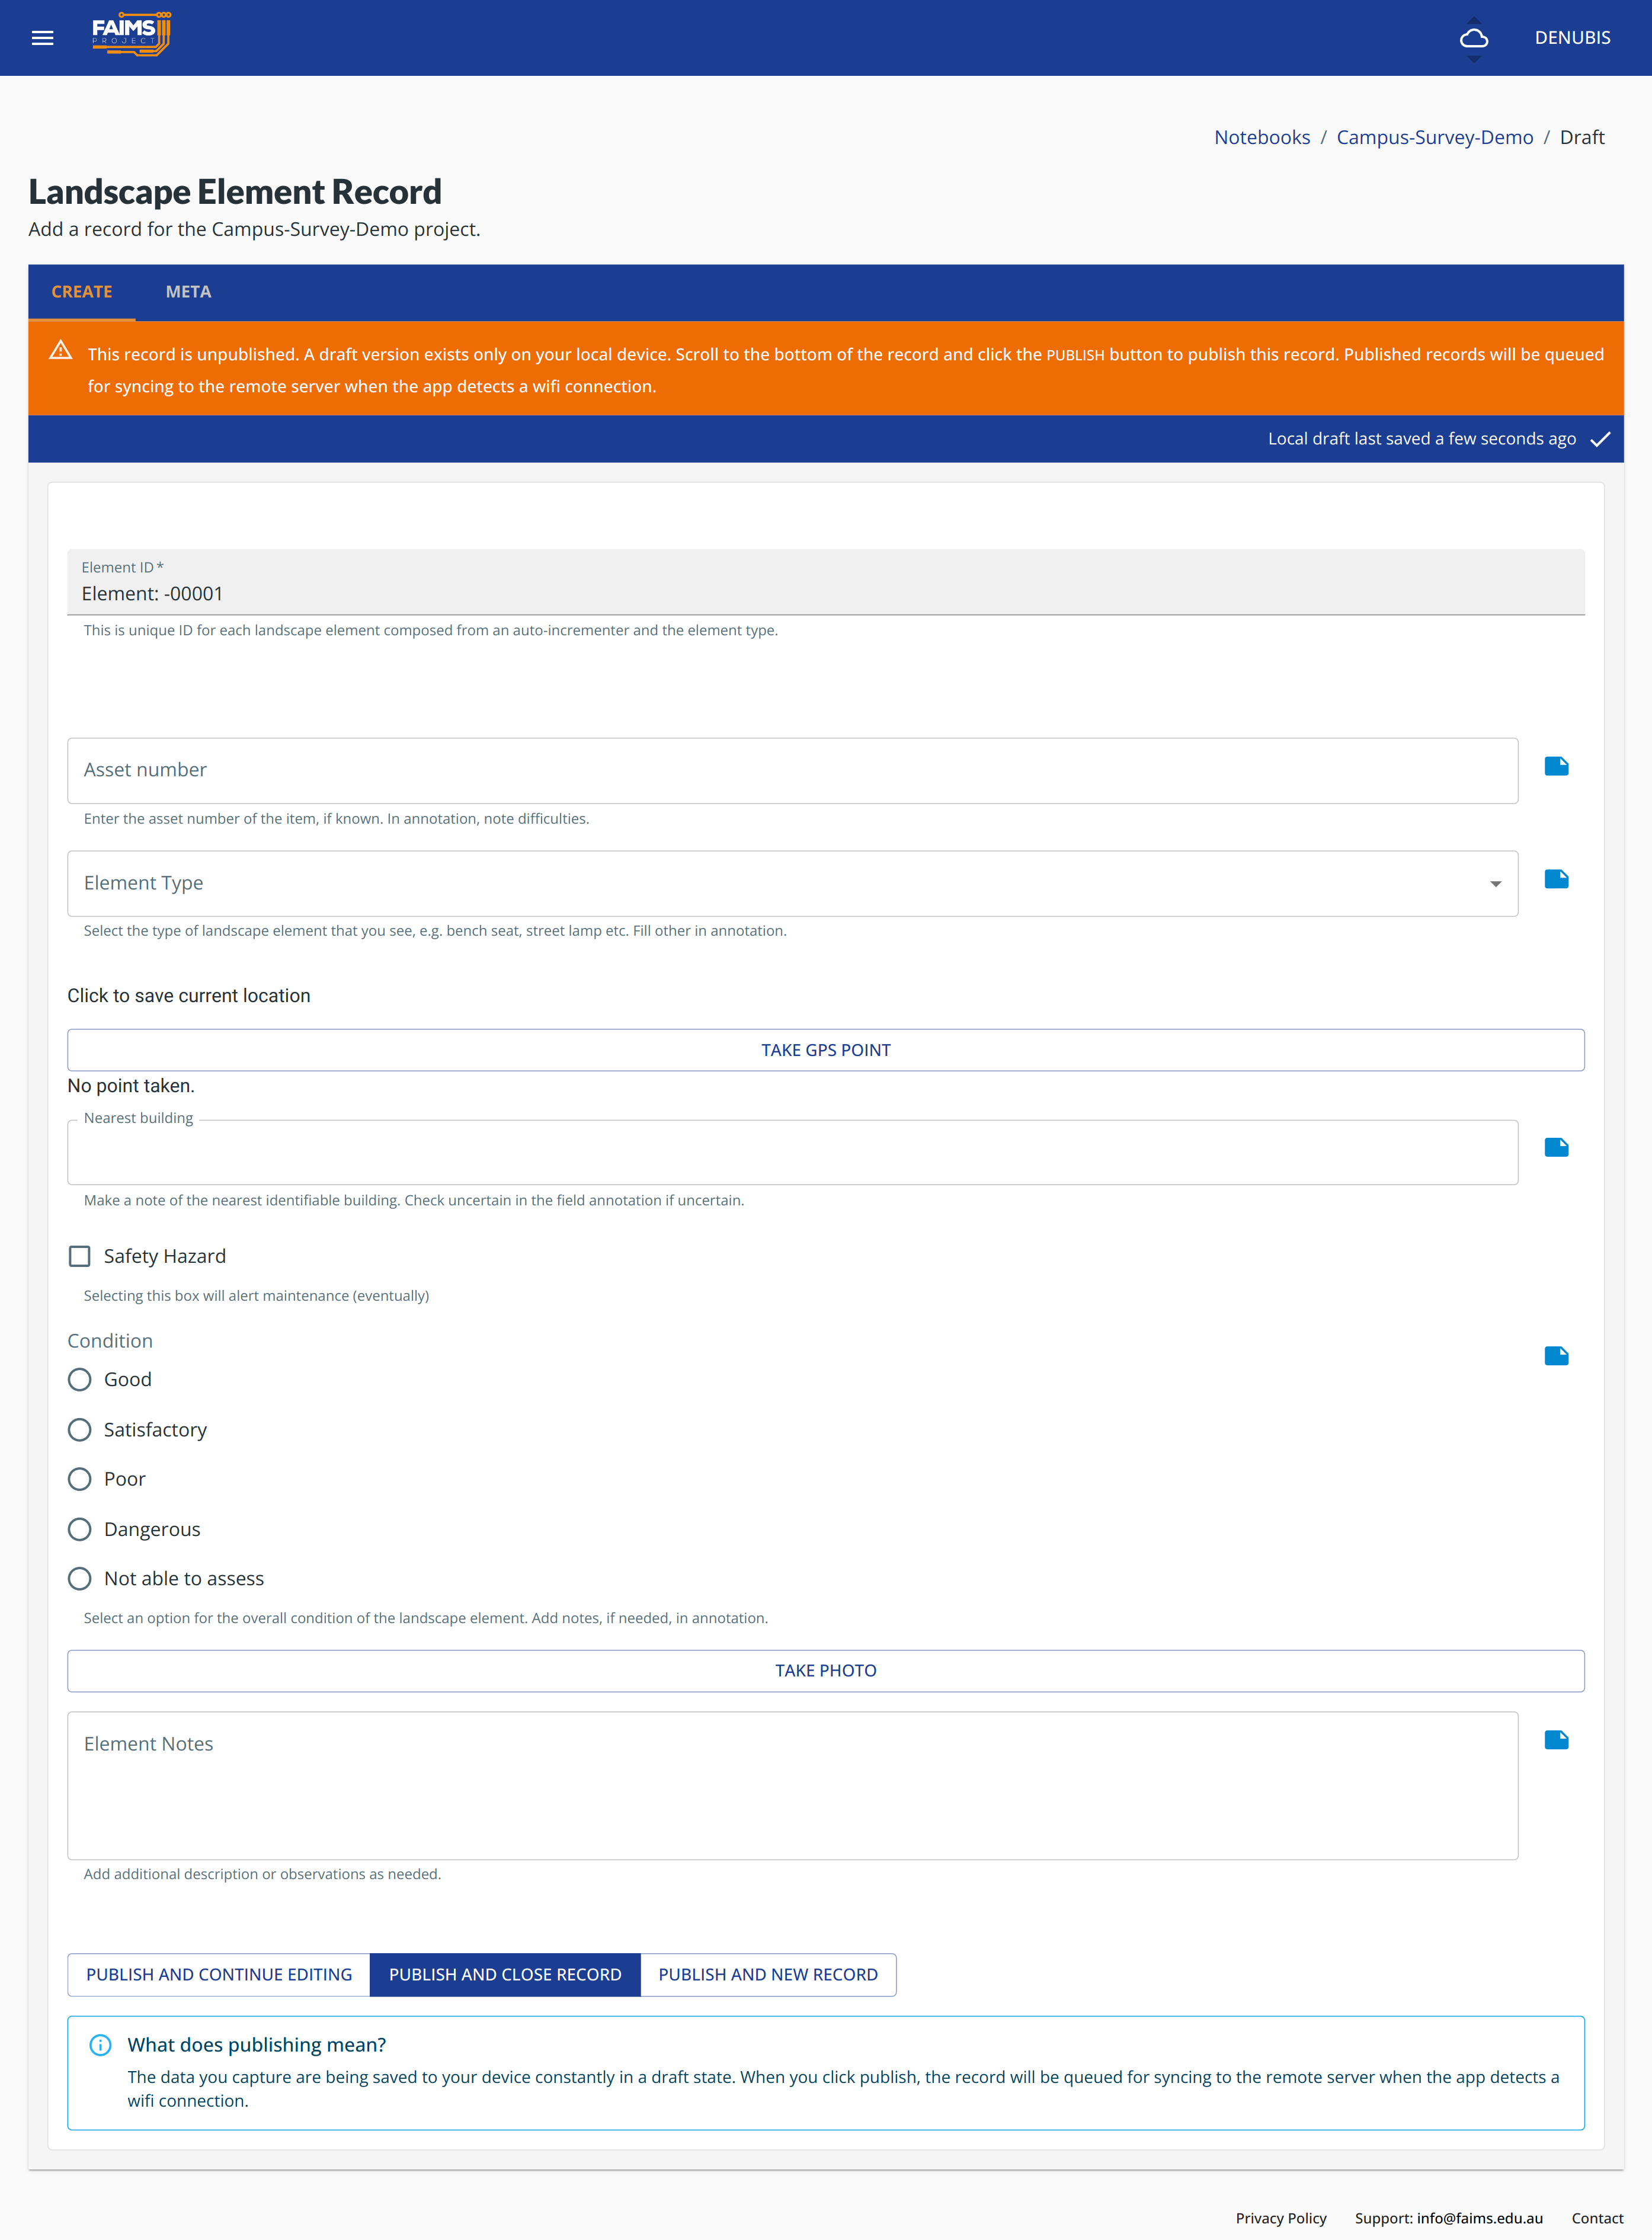
Once you have identified a target for survey (a bench seat, lamp post or sign):
Enter an Asset ID (fictional or based on your observations)
Select an Element Type from the dropdown.
Tap to capture a GPS point.
Enter the name or number of the Nearest building
Select a Condition from the radio list
If the condition is so poor that it is dangerous (tap the Dangerous checkbox)
Tap to take a photograph and the Camera will be called.
Make a Note if needed.
Data editing and review#
Back in the Lab, go to https://fieldmark.app/ and navigate to the Campus-Survey-Demo. Here you can search for all records that you have synchronized.
Meta#
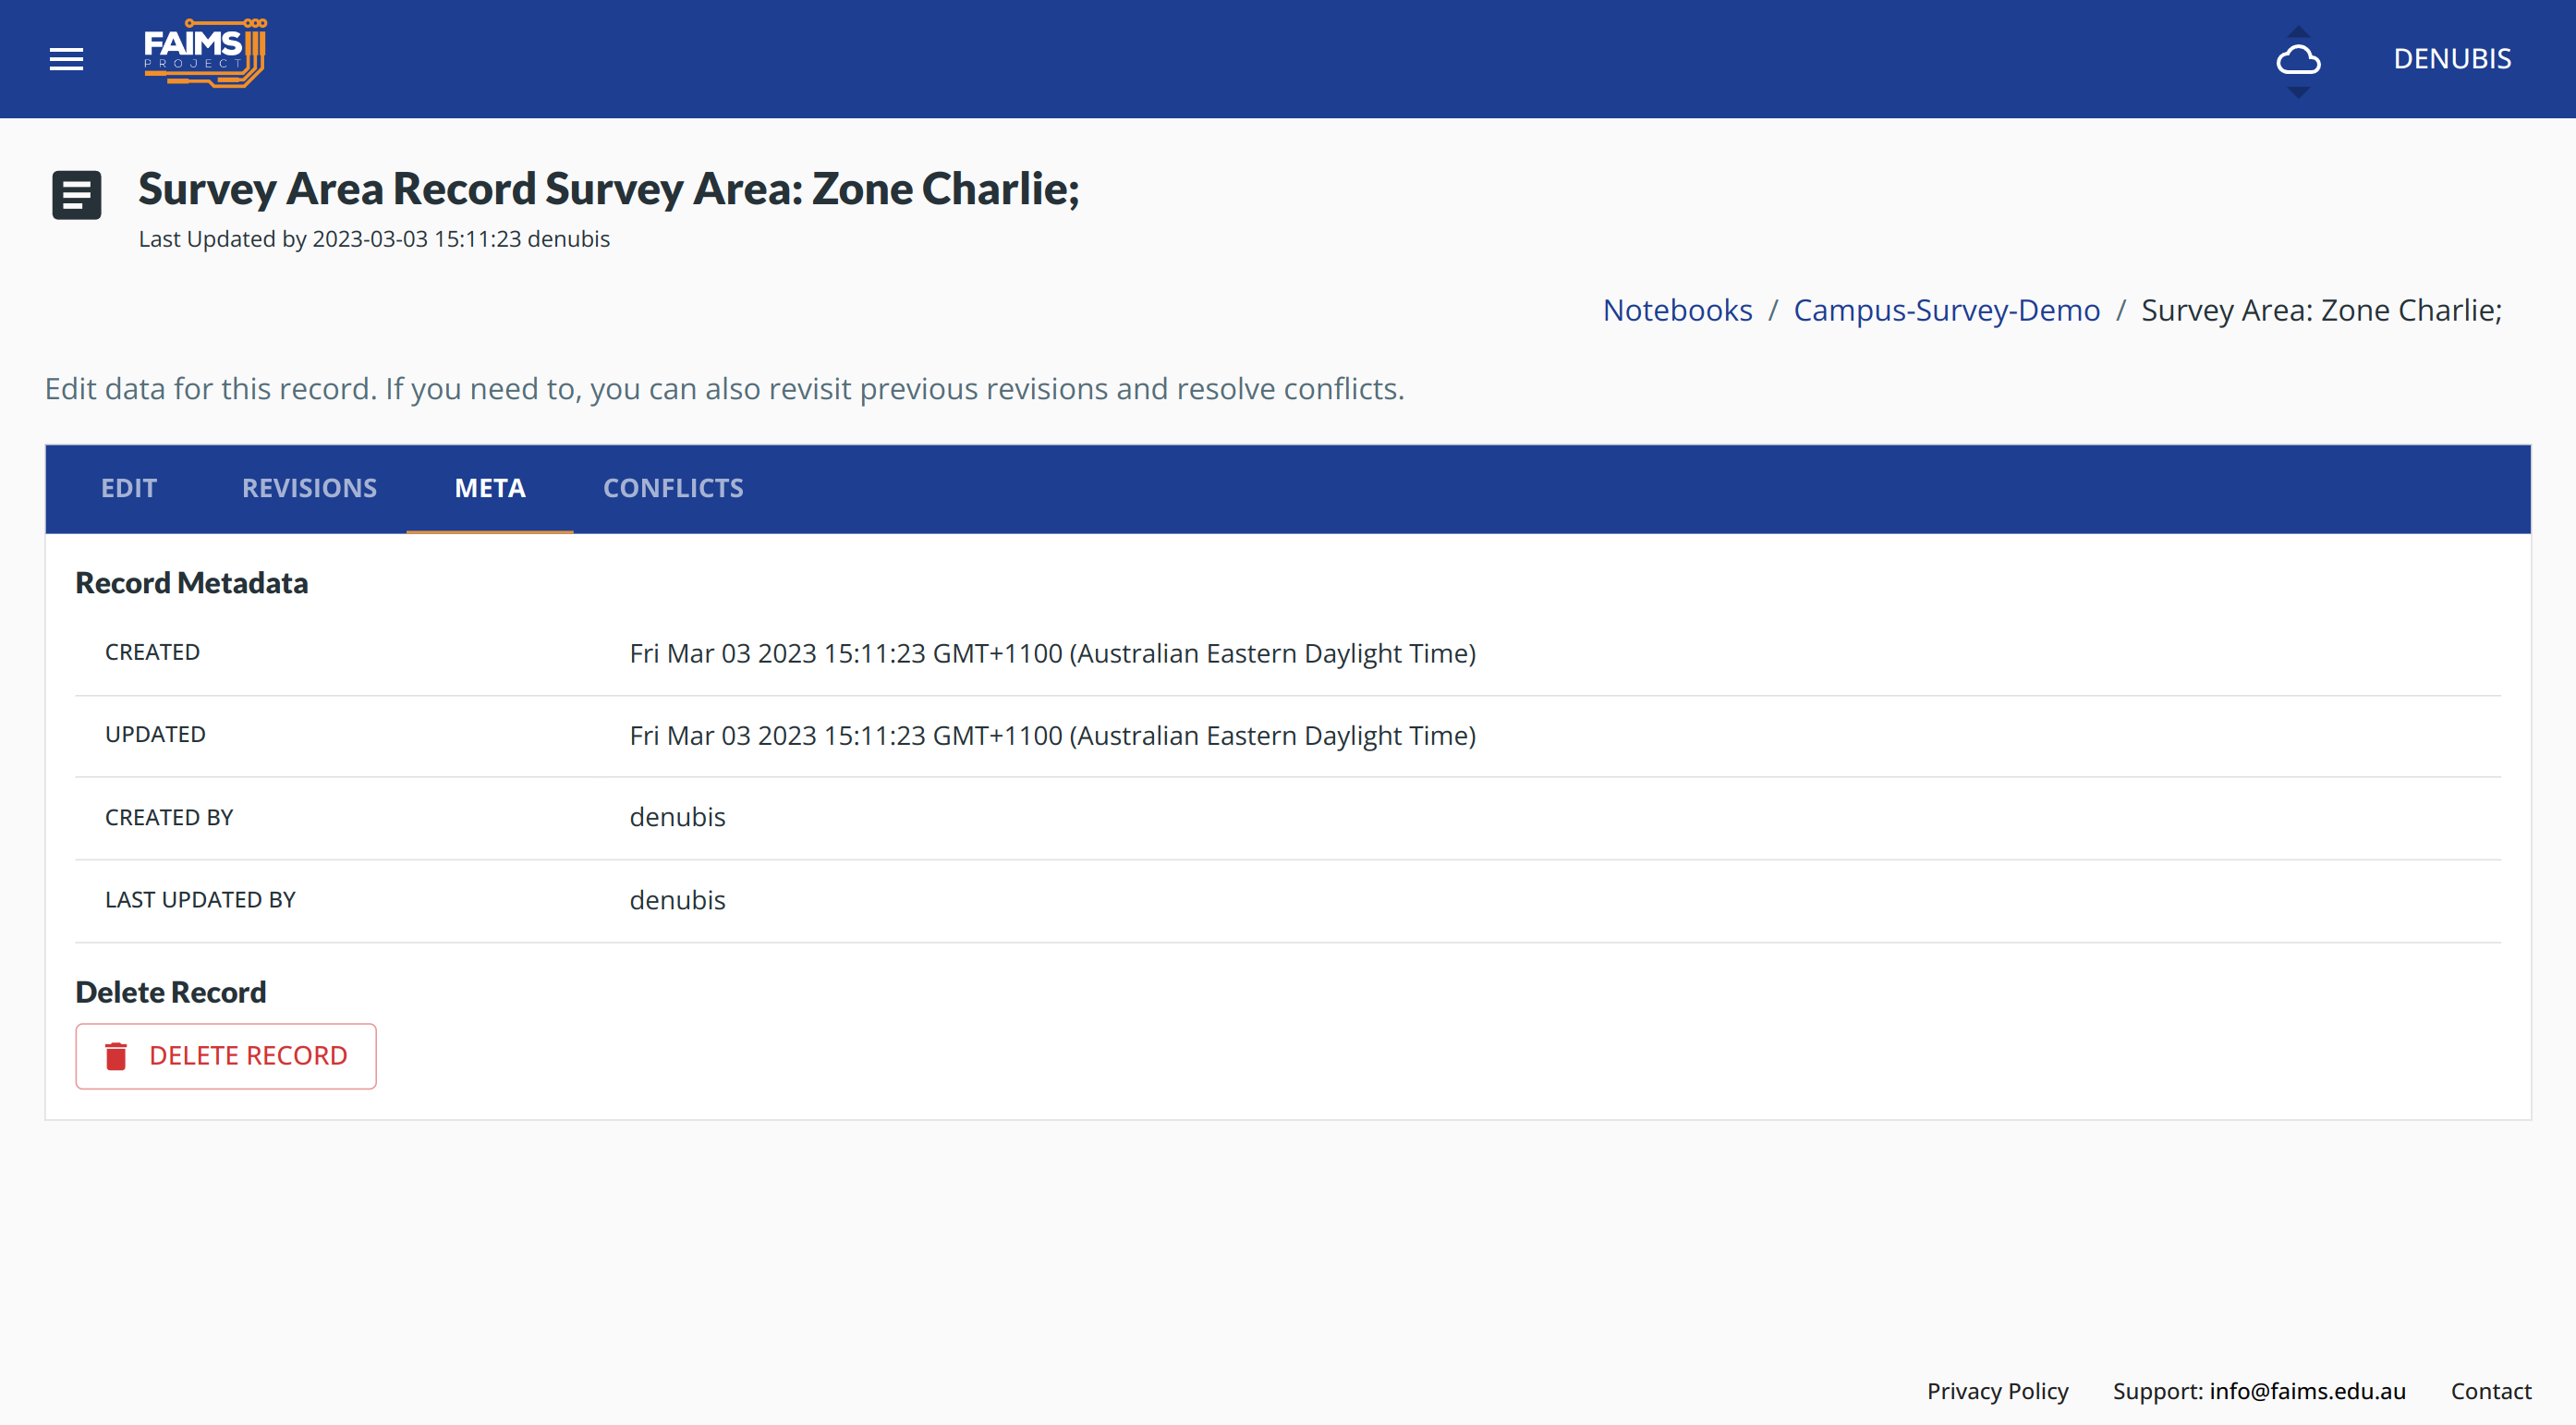
To review record metadata tap on the META tab on a published record.:
Delete a Record#
To delete a record, select from the META tab.
Note
No records are deleted, simply hidden from view. It is possible to undelete records with the command line.